When the construction icon is clicked and the page ‘Administrative Tools’ is opened, then the following menu will appear:

The options ‘Manage Users’, ‘Assign Applications’ and ‘User Report’ will be explained.
The following table is displayed when the option ‘Manage Users’ is selected:
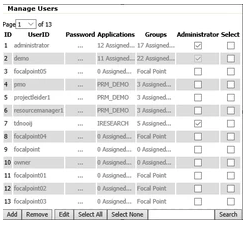
This table provides an overview of the current users in the application. The information shown for each employee is: the ‘UserID’, the password, which applications and groups are assigned to the user and whether the user has the function of administrator. Options are displayed at the bottom of the table, namely adding, removing or modifying a selected employee, the 'Select All' and ‘Select None' button. It is also possible to search in the list of employees with the ‘Search’ button.
Add User
A new screen will open to add a new user. The data of the new user has to be entered as can be seen in the image below. It can be specified in which organization the user is working. Lastly, a password can be entered for the user. The e-mail address of the user is only required when the option to retrieve a password is active. In that case, the new password is sent to the entered e-mail address.
Remove User
To remove a user from the list, you can click on this user after which the button ‘Remove’ can be used.Edit User
When a specific employee is selected, and subsequently ‘edit’ is clicked, then the following page is displayed: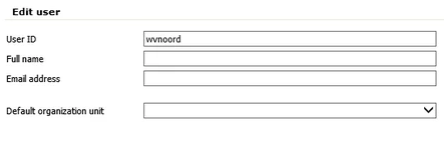
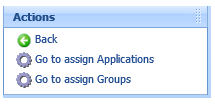
Go to assign Applications
The following page is shown after clicking ‘Go to assign Applications’:
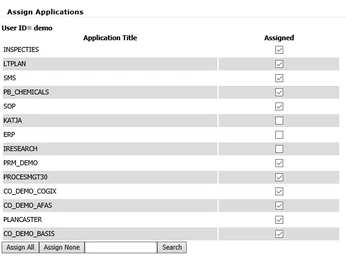
The selected user can be added to applications by ticking the desired applications in the column ‘Assigned’. The buttons 'Assign All' and 'Assign None' can also be used at the bottom of the table.
Go to assign Groups
The following page is shown after clicking on ‘Go to assign Groups’:
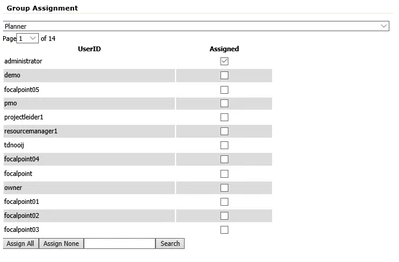
The selected user can be added to groups by ticking the desired groups in the column 'Assigned'. The buttons 'Assign All' and 'Assign None' can also be used at the bottom of the table.
The following table is displayed when the option ‘Assign Applications’ is chosen:
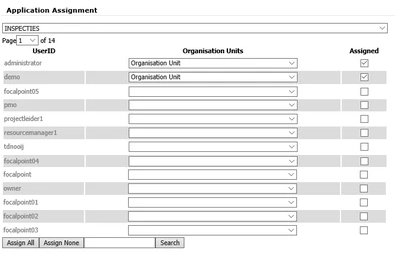
An application can be selected in the top bar of this screen, after which all the users are shown whom can be linked to this application. This can be done by selecting for a specific (or multiple) user (s), specifying an organization unit and then ticking the 'Assigned' column.
The following screen and corresponding pop-up is shown when the option ‘User Report’ is selected:
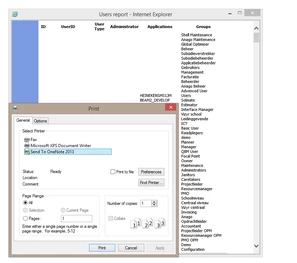
The user report provides an overview of all users. It provides per user information about the user type, whether the user has the function of administrator and which applications and groups the user has at his disposal. The Print pop-up opens automatically when you open this page, so that this user's report can be saved or printed out.